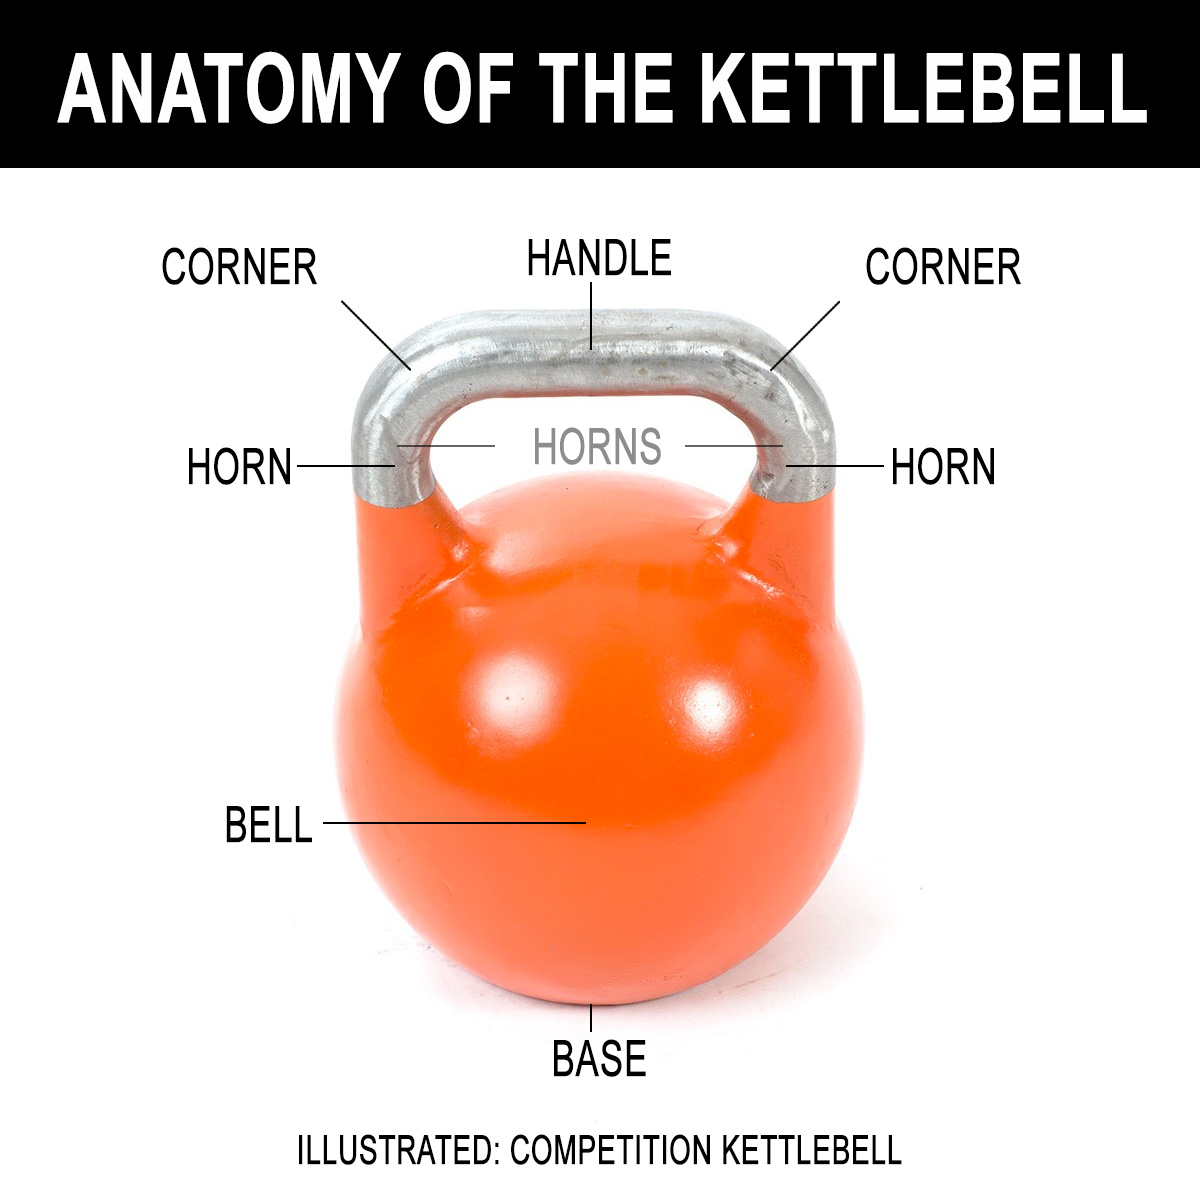
Master these five foundational exercises and you have a complete training system. Each movement builds on the one before it.
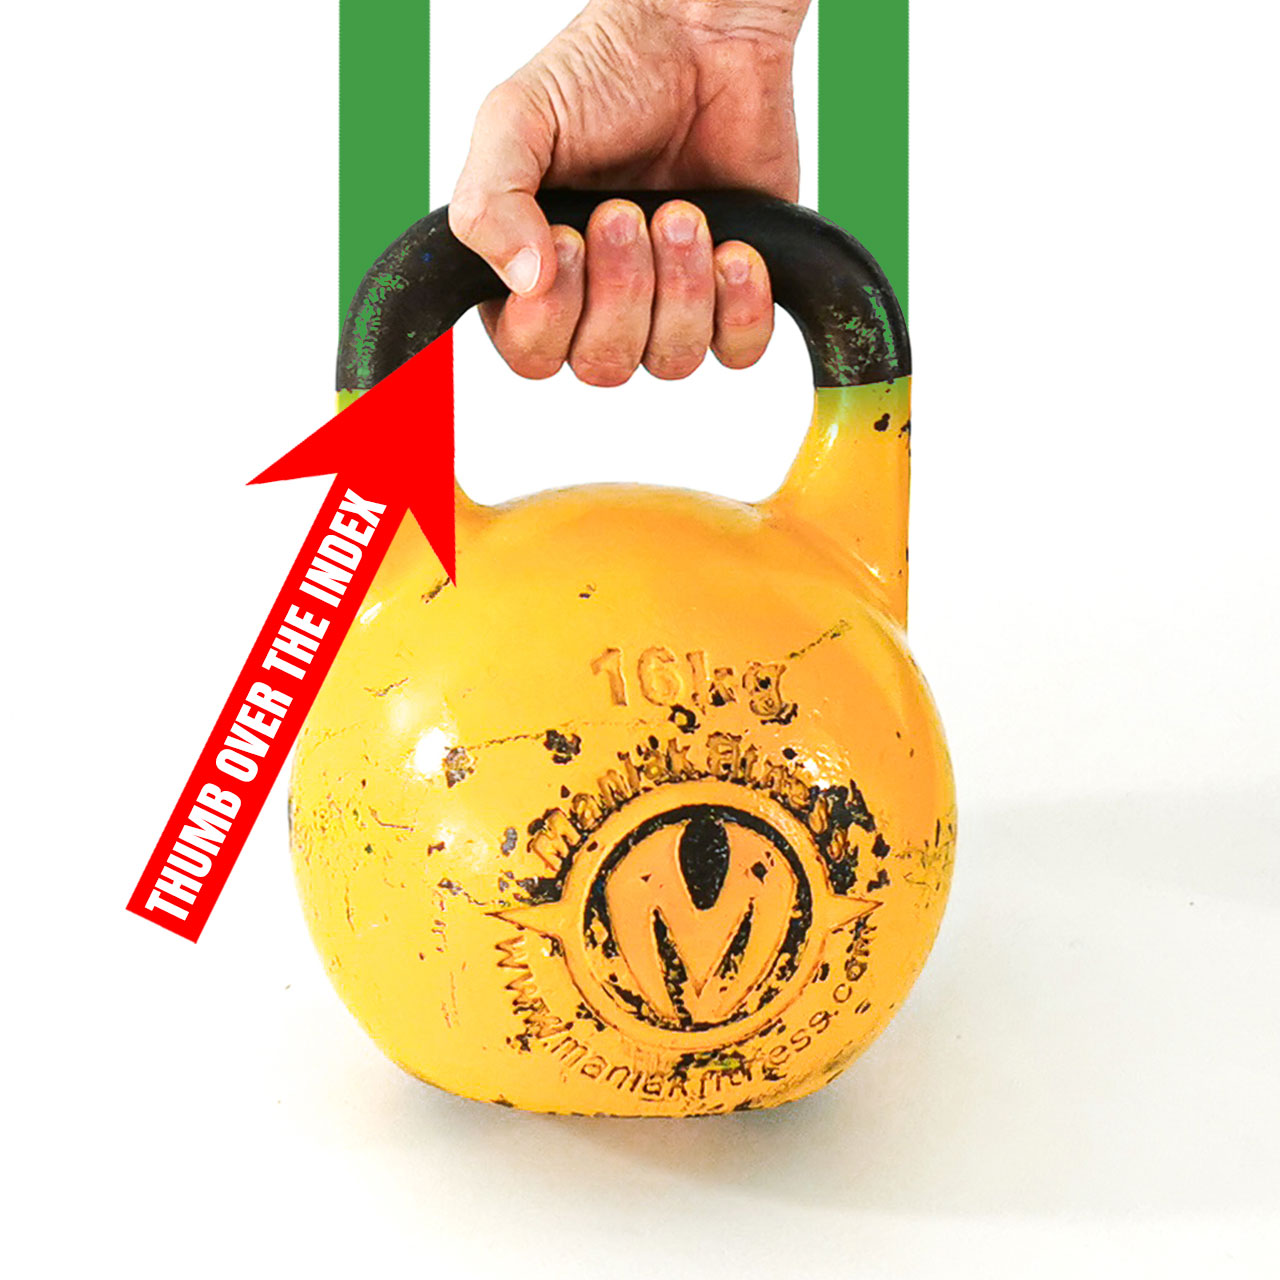
Before learning the exercises, you need to know the parts of the kettlebell: the handle (where you grip), the horns (the sides of the handle), the window (the opening between handle and bell), and the bell (the weighted body).
Understanding the anatomy helps you follow exercise instructions more precisely. When a coach says "grip the horns" or "insert your hand into the window," you will know exactly what they mean.
Learn More in the Free Course →These exercises form the backbone of your kettlebell training. Learn them in this order for the best progression.
The gateway movement. The clean teaches you how to safely bring the kettlebell from the ground into the rack position. Every other exercise starts or passes through here. Master the clean first, and everything else becomes easier.
Foundation movement — learn this first
The fundamental lower body exercise. Holding the kettlebell in the rack position, you perform a controlled squat that builds leg strength, improves mobility, and develops core stability. The goblet squat variation is ideal for beginners.
Lower body strength & mobility
Pressing the kettlebell overhead develops shoulder strength and stability. From the rack position, you drive the bell upward to a locked-out position above your head. Strict pressing builds real, functional upper body strength.
Overhead strength & shoulder stability
The row builds a strong back and improves posture. Hinging at the hips, you pull the kettlebell toward your torso, engaging the lats, rhomboids, and biceps. Essential for balancing all the pressing work.
Back development & posture
The king of kettlebell exercises. The swing is a ballistic hip-hinge movement that develops explosive power, cardiovascular fitness, and posterior chain strength. It is introduced last because it requires a solid foundation in hip hinging, grip, and body awareness.
Power, conditioning & fat loss
Poor grip is the number one cause of forearm bruising, torn calluses, and wrist pain. Understanding grip transitions is essential.
The hook grip is your default grip for swings and ballistic movements. The handle sits in the hook of your fingers, not deep in the palm. This prevents the handle from grinding against your skin and tearing calluses.
Gripping too tightly or too deeply in the palm creates friction that leads to blisters and calluses. The hook grip gives you control without the damage.
When cleaning the kettlebell into the rack position, proper hand insertion prevents forearm bruising. The hand should rotate around the handle so the bell lands gently on the forearm, not crash into it.
This technique takes practice but is essential. The difference between a bruised forearm and a clean rack is all in the hand insertion timing.
Recognizing these mistakes early saves you weeks of pain and frustration.
A grip that is too loose causes the bell to flop around, creating unpredictable forearm impacts. A grip that is too tight causes rapid fatigue and callus tears. The correct grip is firm but not white-knuckle, and it changes depending on the phase of the movement.
The wrist should be straight in the rack, not bent backward. The bell should rest against the forearm at an angle, supported by the shoulder and hip structure, not held up by the arm alone.
A bent wrist under load can lead to wrist injury over time. This is one of the most common mistakes we correct in the beginner course.
The hip hinge is the most important movement pattern in kettlebell training. It is the foundation of the swing, the clean, and every pulling movement. Without a proper hip hinge, these exercises become back exercises instead of hip exercises, leading to pain and injury.
We dedicate an entire section of the beginner course to hip hinge drills. You should be able to hip hinge perfectly before ever swinging a kettlebell.
Learn Hip Hinge Drills →